Construction of two-and three-layered wall.
To achieve the maximum effect of heat and sound insulation of external walls they usaully are constructed of two or three layers.
- supprot layer – supprot wall with ordinary bricks, ceramic blocks, cellular concrete, etc.;
- insulating layer (if needed) – insulation made from mineral wool, polystyrene;
- facade layer – outdoor (exterior) of masonry or clinker facing bricks.
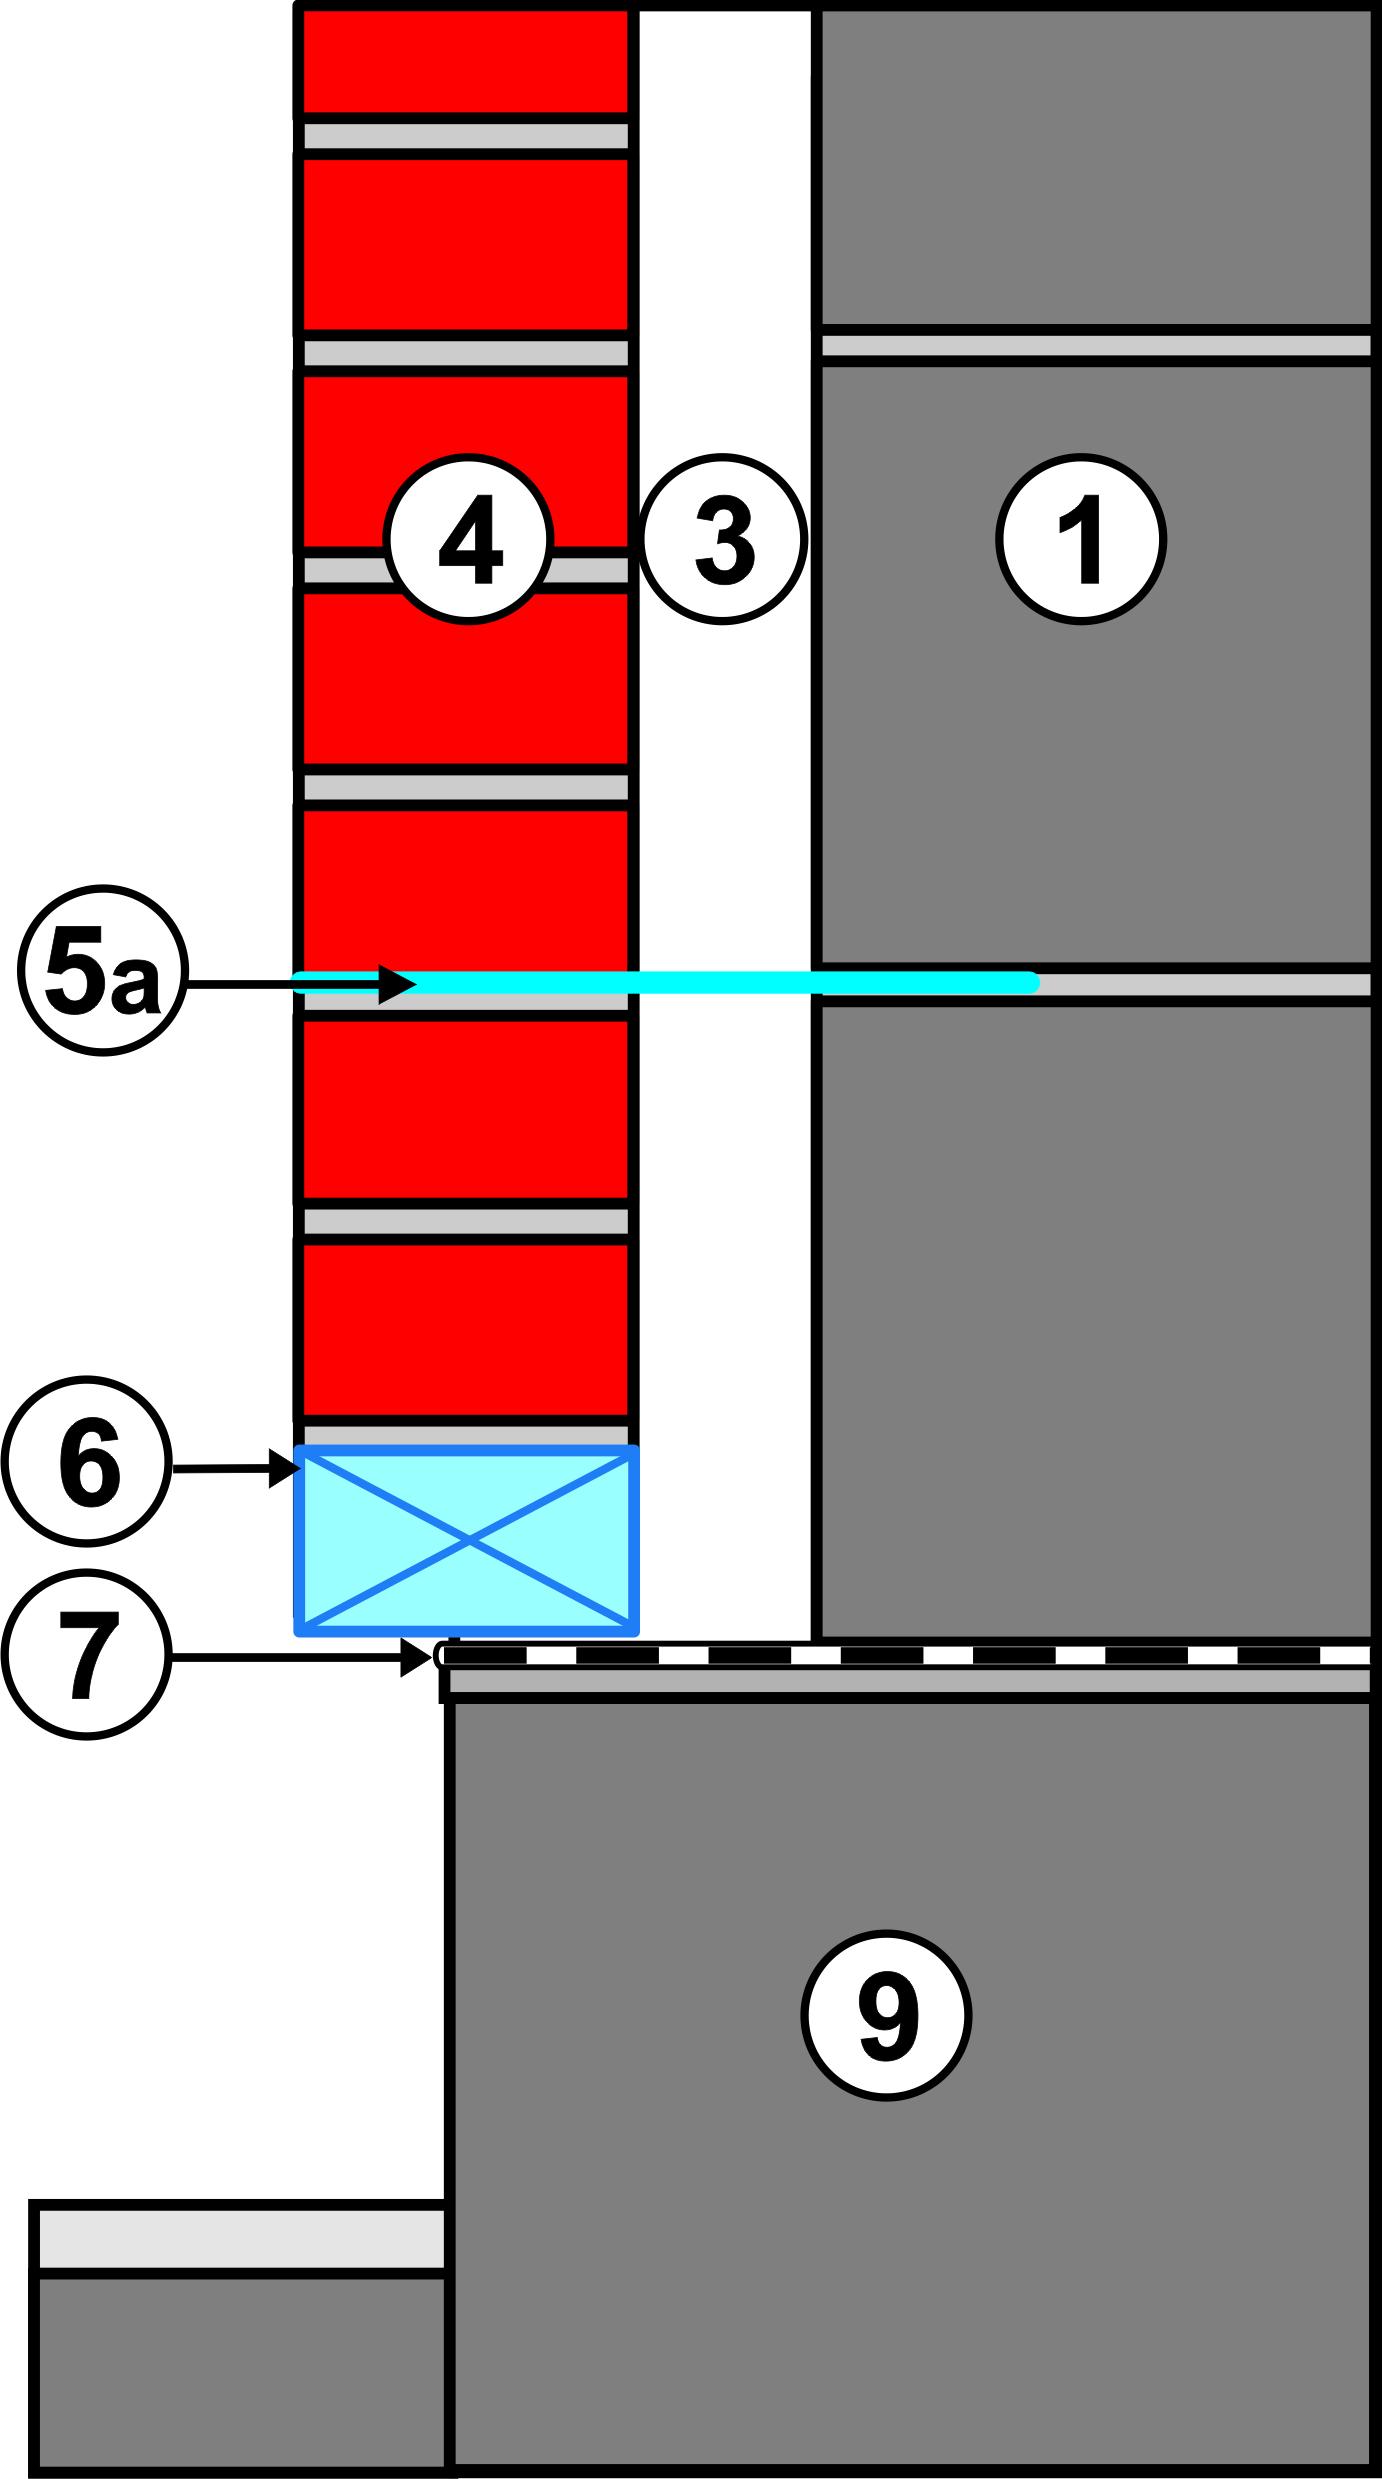
In addition it is necessary to leave the ventelation layer while building walls whether you use a heater or not. Ventelation layer should be 2-4 cm wide This will prevent condensation of atmospheric moisture, which greatly reduces its heat insulating properties.
| Wall without heater | Wall with heater |
 |
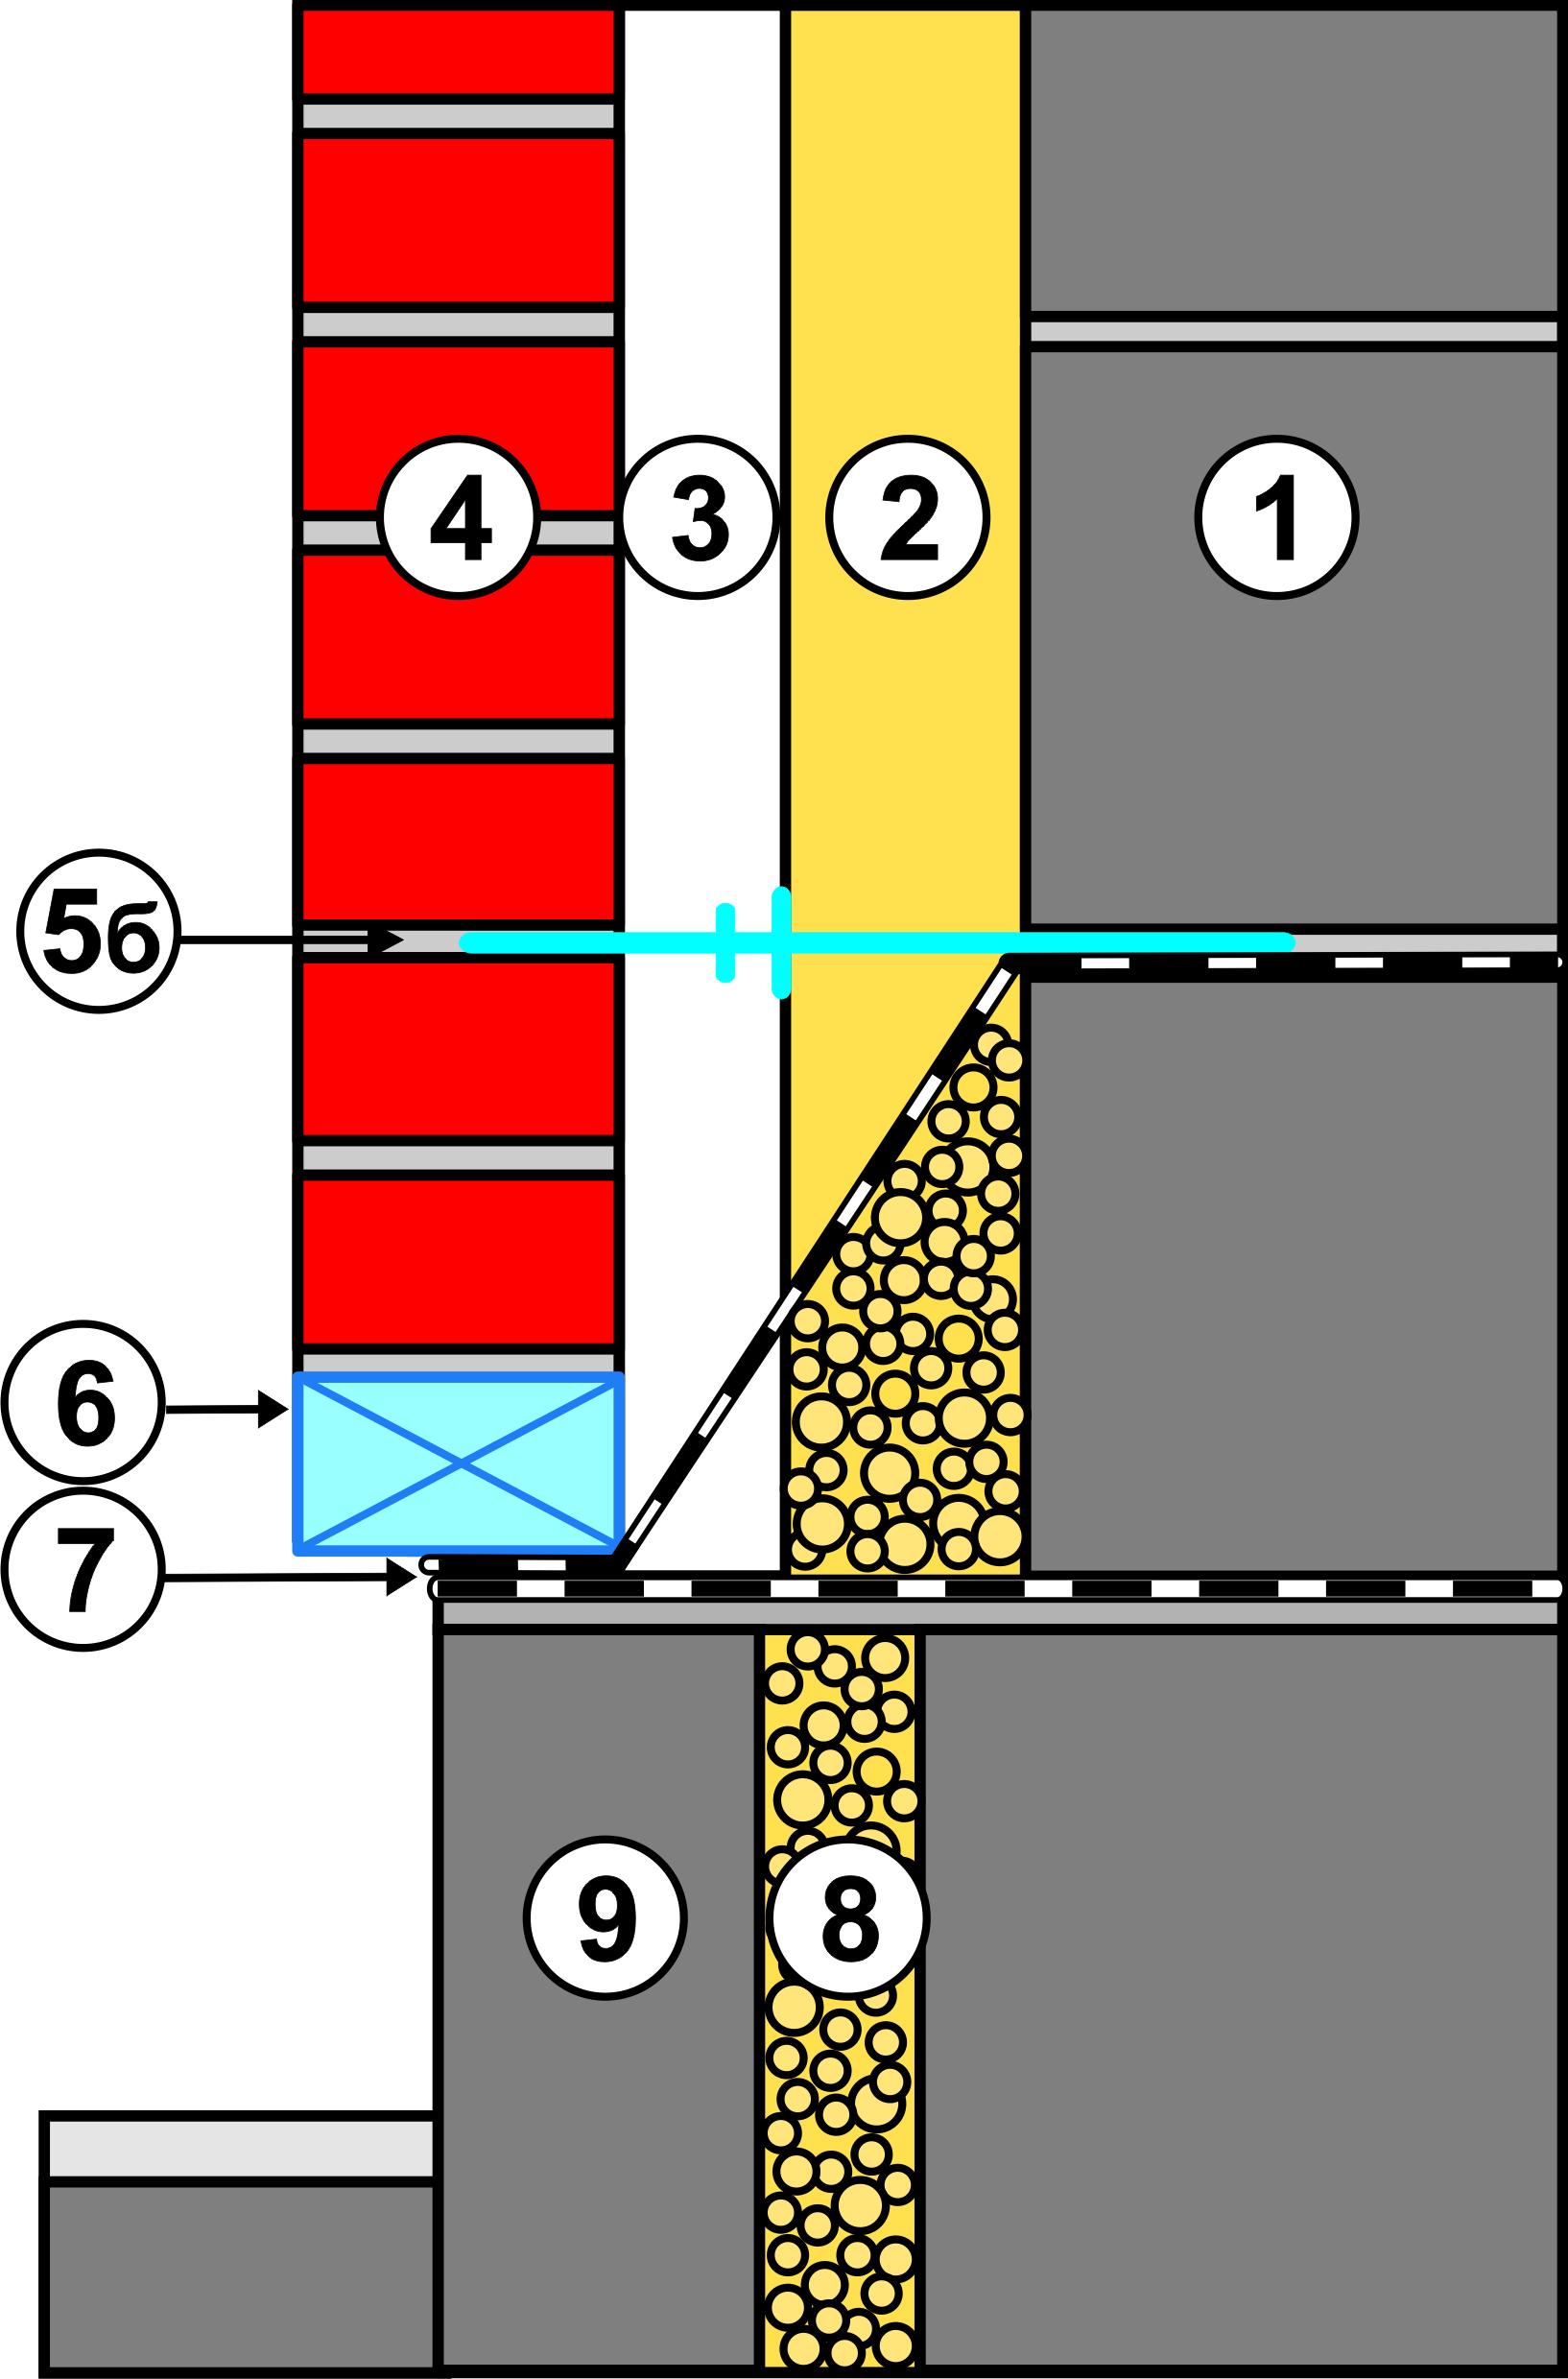 |
1) Supprot wall
2) Heater – mineral fibre
3) Ventilation layer
4) Facade wall
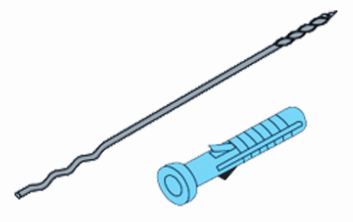
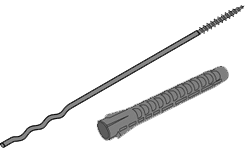
5а) Anchor
5б) Anchor with pressing circle-drip
6) waterproofing apron
7) Ventilation-draining box
8) Insulation – polystyrene
9) Socle
Important! While building the facade wall you solution shouldn`t penetrate a ventilation layer.
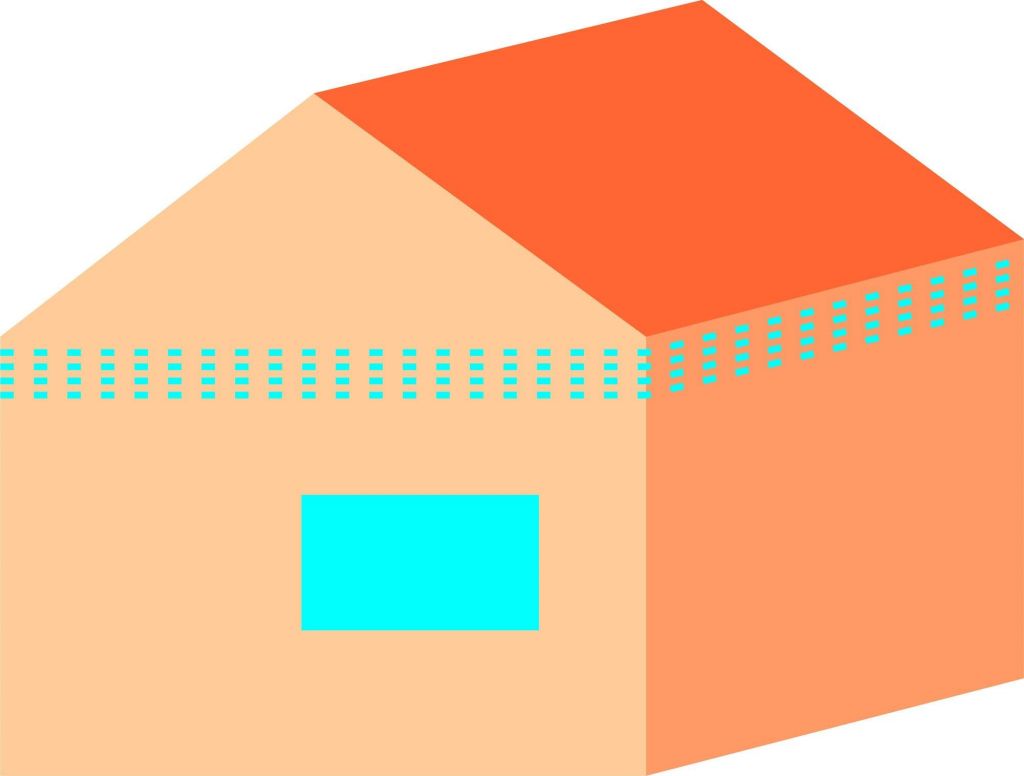
Ventilation
Because of temperature changes in ventilation layer sometimes can condense moisture, so you need to take care of full circulation of air in it and possibility to drain condensate. To make it possible, leave blank facade masonry seams – vertical seams, blank solution. The sence of the location of the ventilation blank seams is to make air circulate free in the ventilation layer.
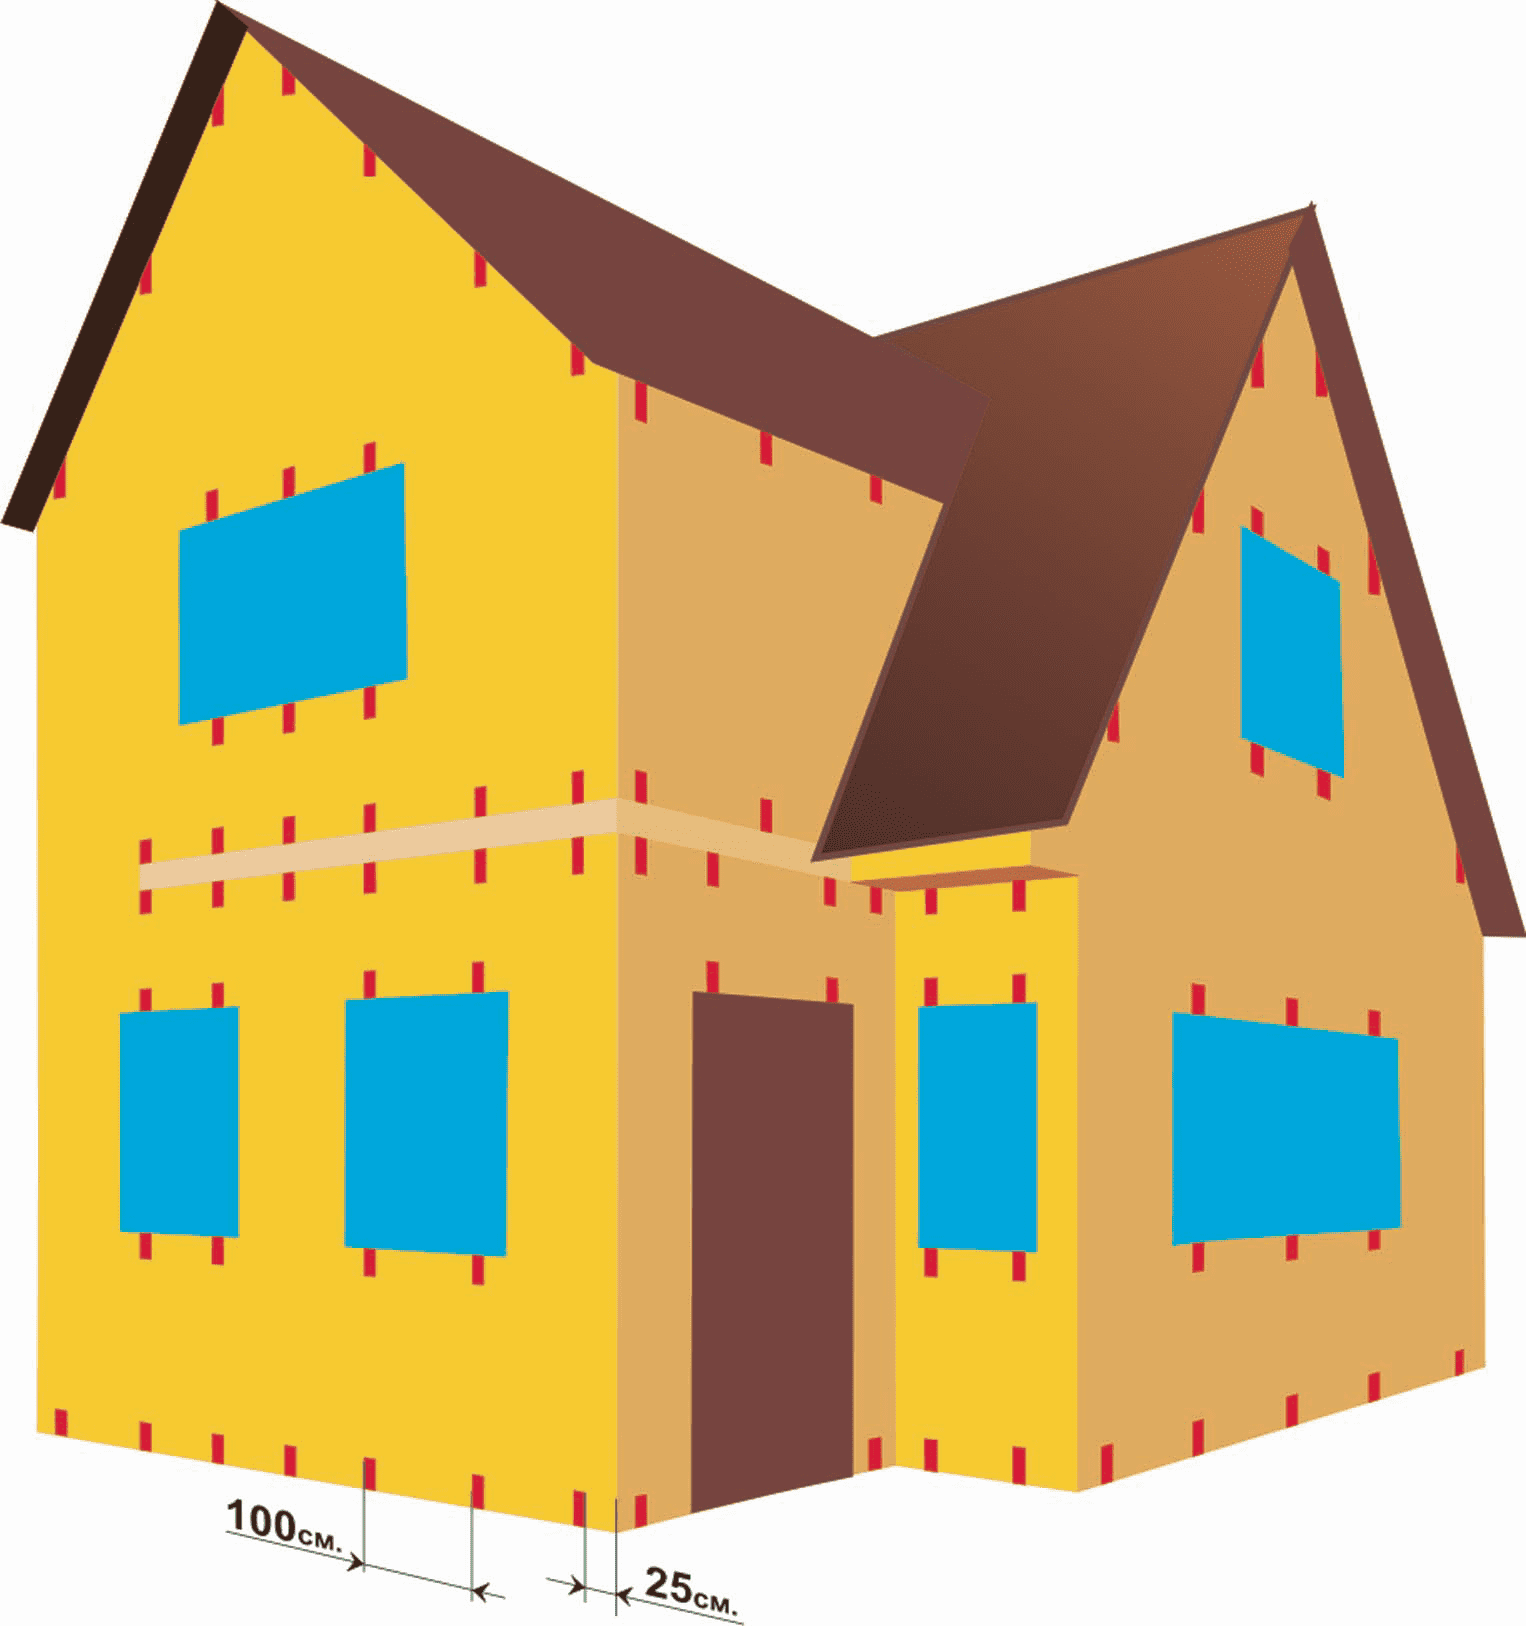
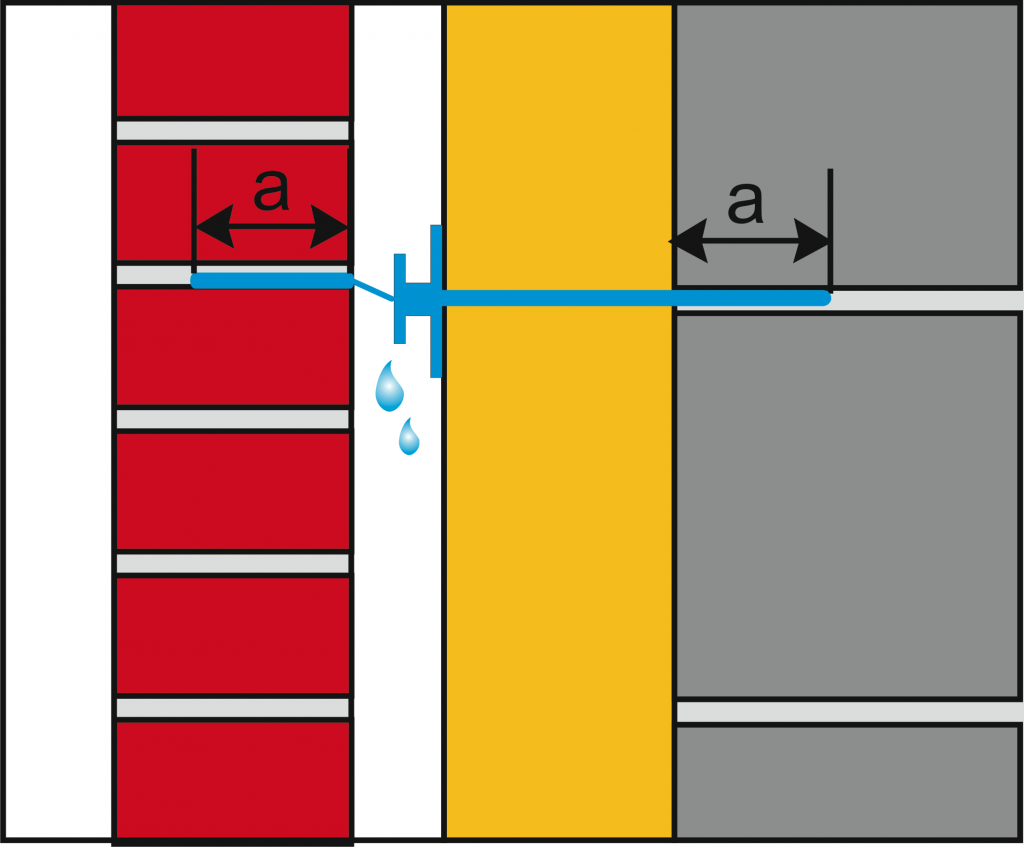
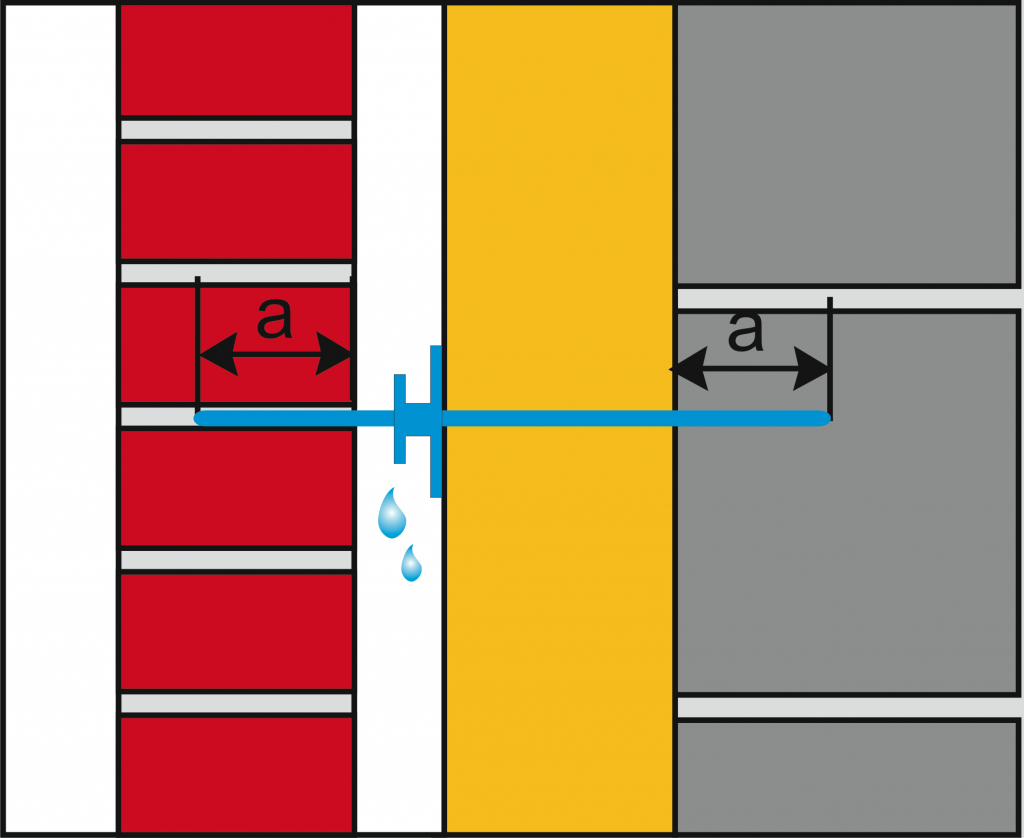
Location ventilation blank seams.
So, ventilation blank seams locate:
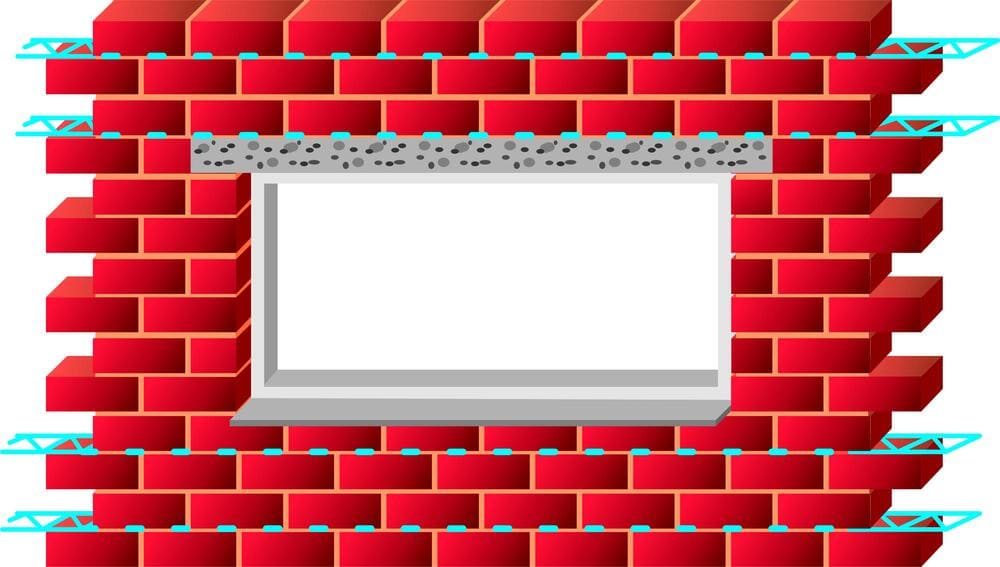
- In the lower and upper rows of masonry with a step 100-150сm, not closer 25сm the angle of the wall;
- Under and over windows just 100cm but not less than 2 units on the window;
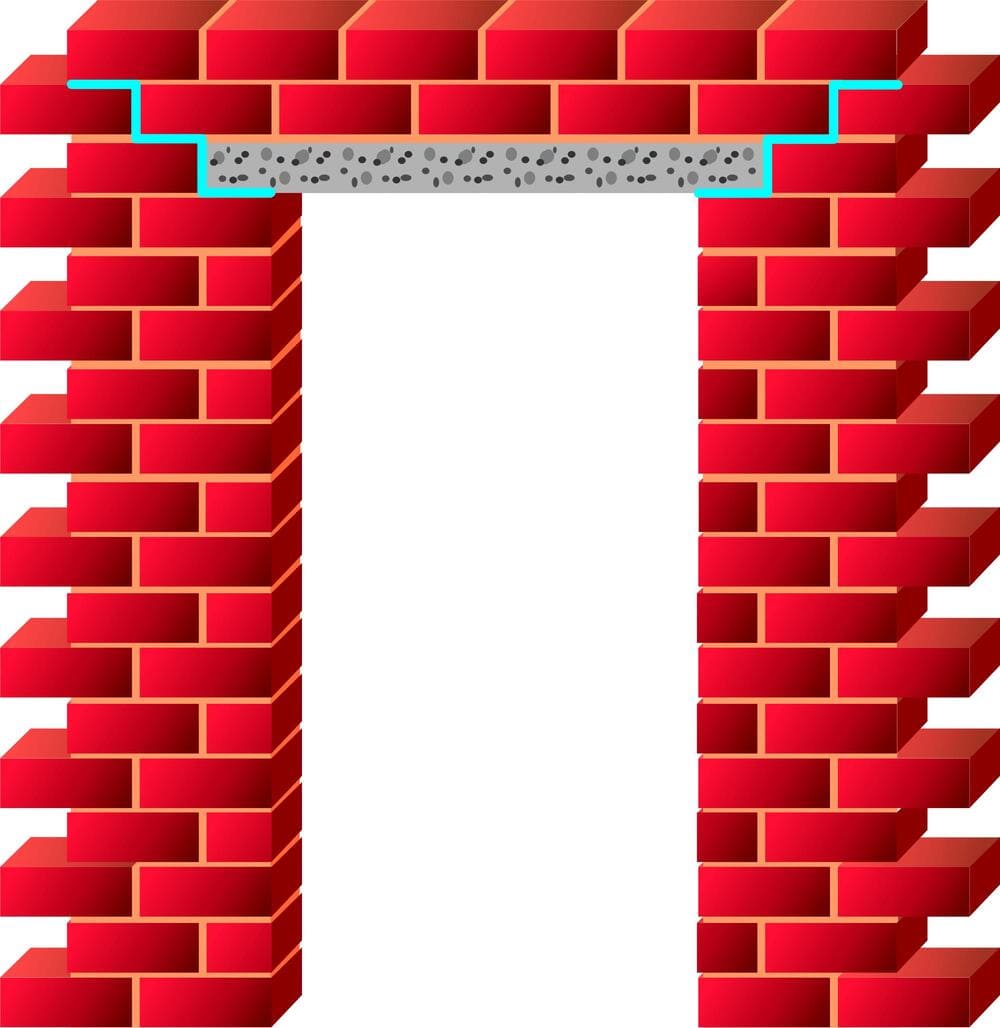
- Over doorways;
- Under and over bridges and overlappings in high rise building;
- Additionally in the middle at the height of the wall over 6m.
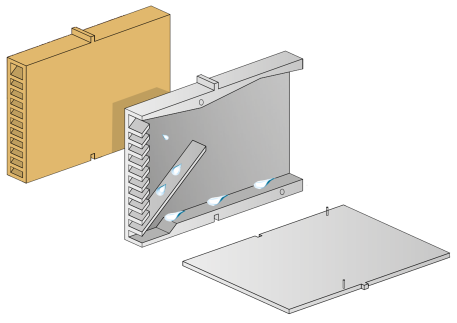
To remove condensate in the bottom row and rows of windows, doors, overlappings and lintels additionally put ie. “Waterproofing apron” – waterproofing with a tendency to blank seams. To prevent the penetration of insects, ventilation blank seams are laid with special ventilation, drainage boxes or inserts with conventional plastic mesh, rolled into a tube.
Ventilation, drainage box
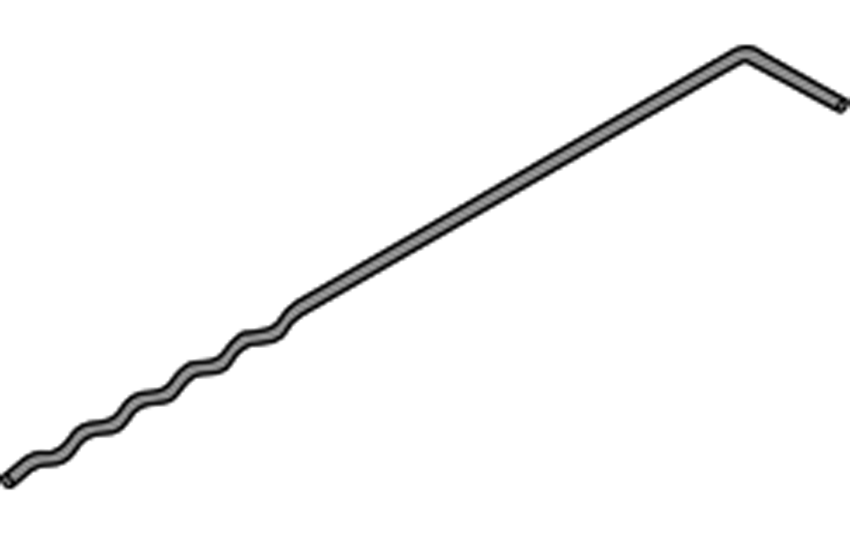
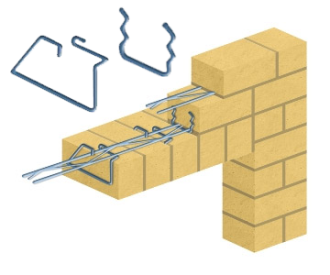
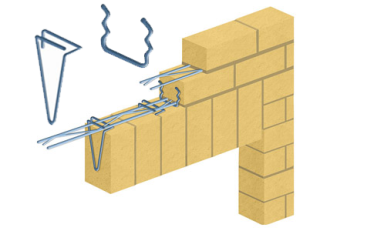
Anchoring.
Connect of masonry facade with supprot wall performed by means of bolts, made of corrosion-resistant materials: corrosion resistant steel, composite plastic (fiberglass, basalt plastic). By way of attachment to the supprot wall, anchors are divided into embedded and driven
Embedded anchors
 |
 |
Driven anchors with dowels
 |
 |
First are placed in horizontal seams of supprot wall immediately upon its construction
Second driven into already constructed supprot wall, directly during installation heat insulation materials and facade masonry.
Important Laying of anchors in facade clutch carries only in solution to a depth of 6-8 cm
The first connection method makes laying anchors easier but complicates subsequent installation of insulation and construction of the facade wall: due to a possible mismatch of horizontal seams and front supprot masonry, it is necessary to anchor coverages.Wrinkling of anchors carries only to upper side. Besides, this method of construction requires performance of all layers of the wall during one construction season.
The second connection method complicates mounting of anchors in supprot walls, but makes easier to install insulation, rejects the need for bending anchors (which strengthens the connection) allows the installation of insulation at exterior masonry on the next construction season.
If the construction of the wall provided ventilation layer, the anchors must wear special pressing circle-drip.
 |
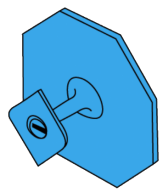 |
It has a double function: presses mineral insulation to the supprot wall and removes moisture from the layer, condensing by itself.
Depending on the height and length of the wall, wind load, presence of architectural elements the number of anchors can be from 4 to 8 pieces per square meter. Practice show that the optimal number is 5 pieces per sq. m. Either, leave calculation of anchors numbers to professional-constructor. Here we give only general recommendations on the location of anchors in the wall
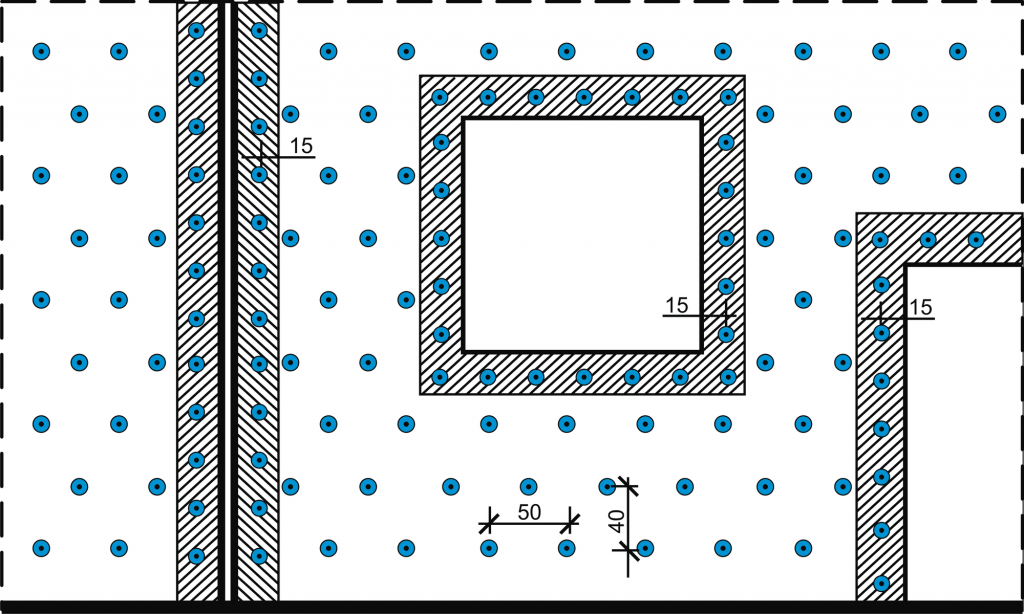
Maximum distance between anchors horizontally must be 50 cm. Vertically 30-40 sm between each other, or in fith row of facade masonry. Laying of anchors must be conducted in “Chess” order.
You should pay attebtion to the most problem areas of the wall – corners, lintels, window and door openings. Here anchors have to be layed linearly vertically and horizontally about 30 cm from each other, and at least 15 cm from the edge of the hole or corner.
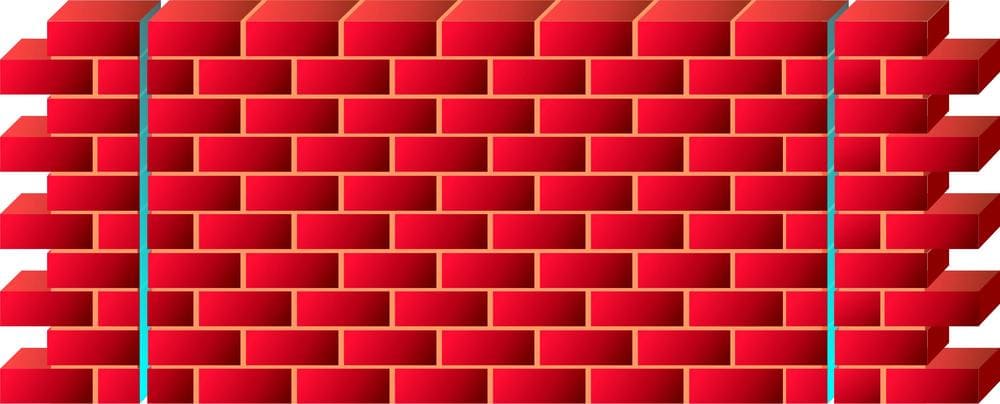
Deformation seams
Quite important construction detail of the walls are deformation seams – unfilled vertical or horizontal seams, leaved in places where you would expect a shift supprot and facade masonry. Deformation seams are divided onto temperature and shrinkage. Deformation seams equip in long walls to prevent cracks due to temperature changes or temperature difference between front and supprot clutches. Shrinkage seams are made in places where irregular wall or different parts of the building shrinkage can be formed.
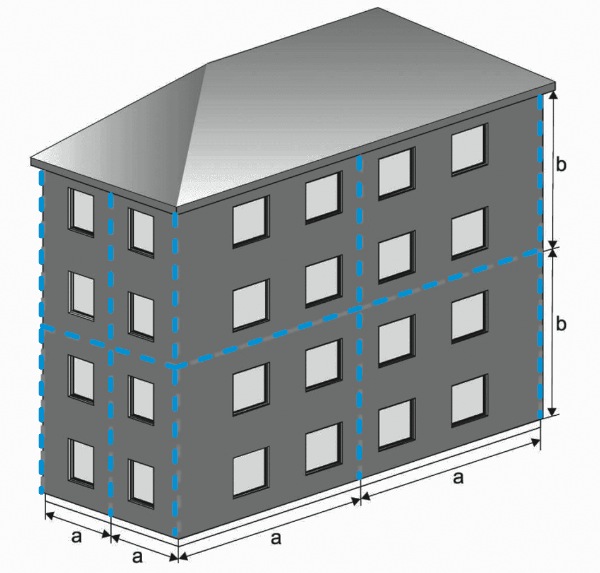
Deformation seams location
| Complete support of masonry facade | Partial support of masonry facade |
Allowable distance between deformation seams
| Vertical seams (Width) |
12-14 m | for norhten facades |
| 12-14 m | for northen facades | |
| 10-12 m | for eastern facades | |
| 8-9 m | for southen facades | |
| 7-8 m | for westen facades |
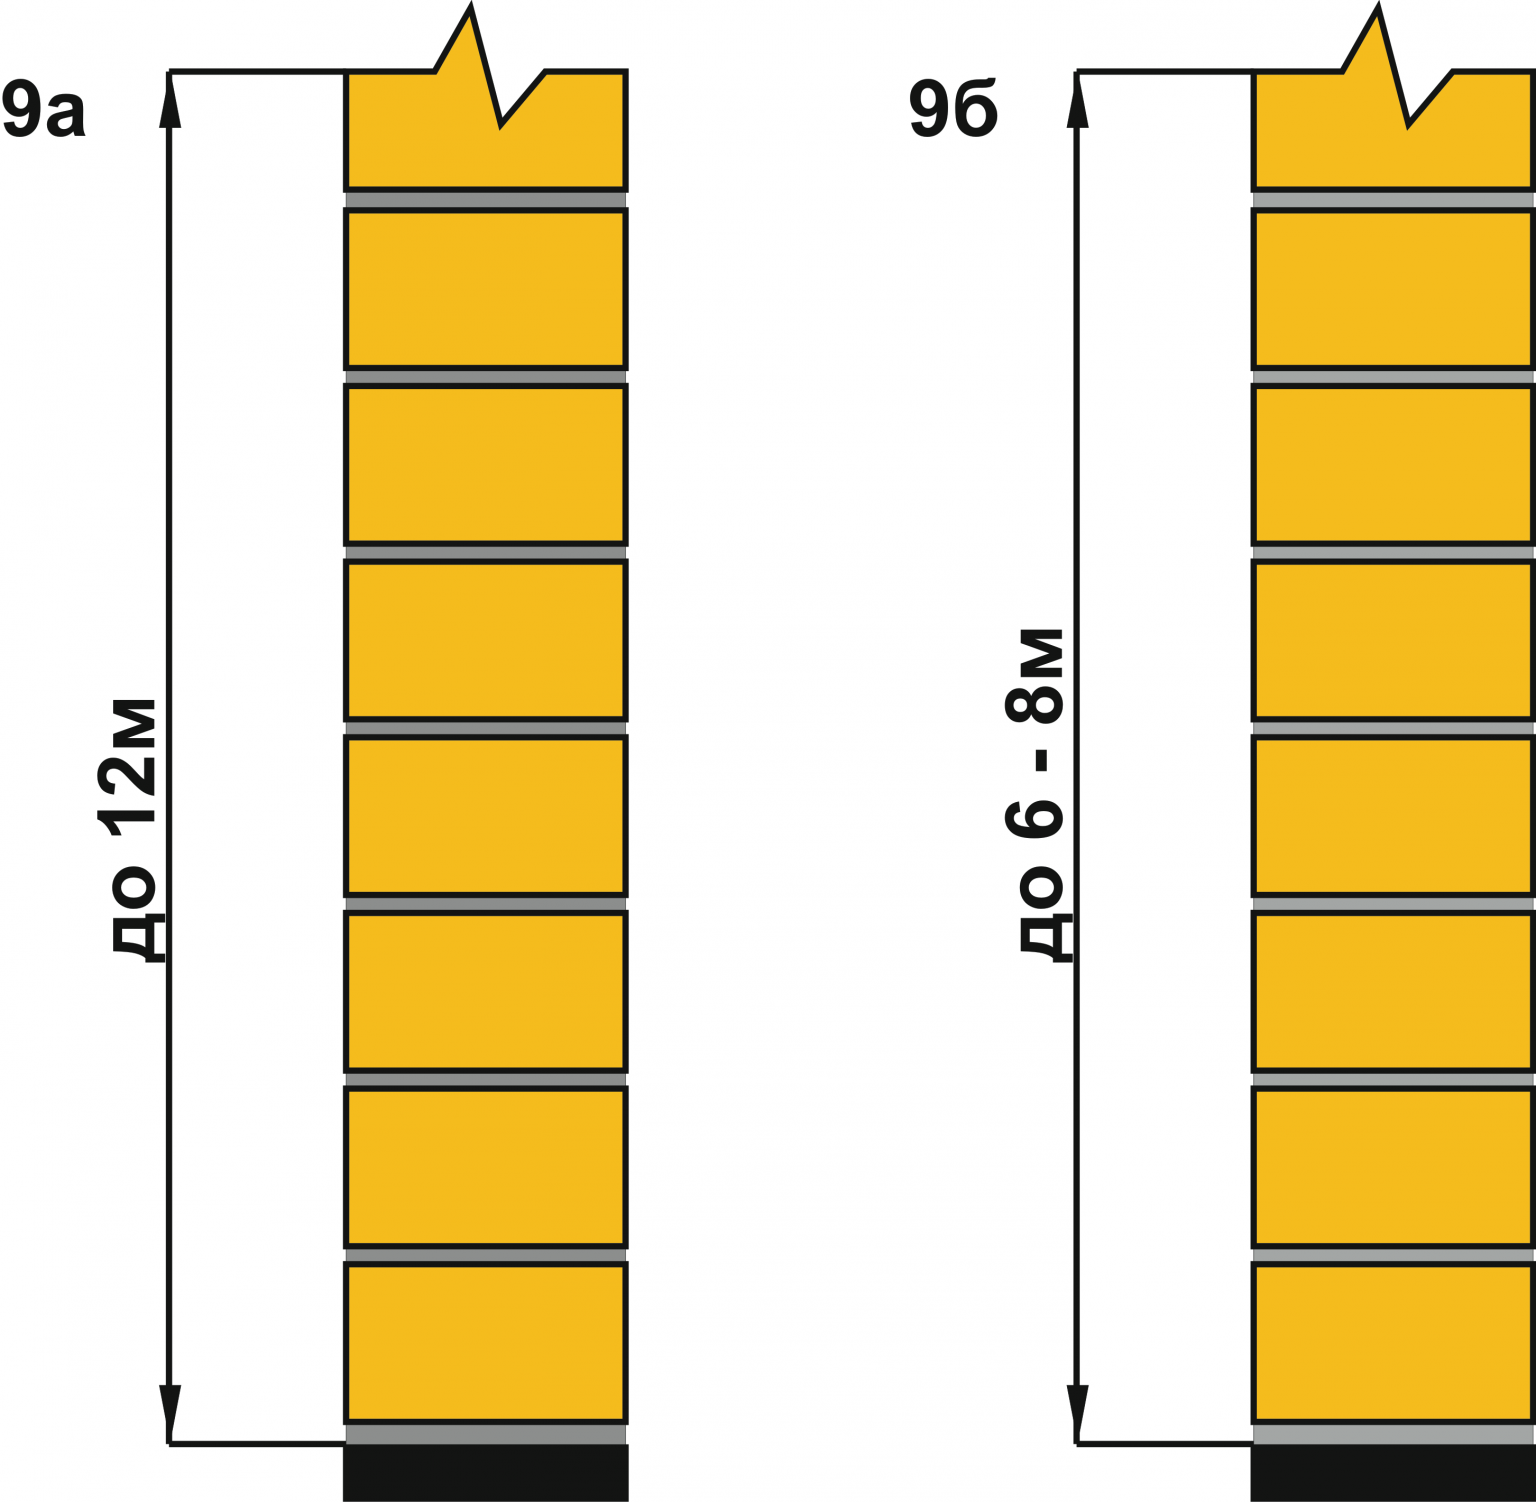
| Horizontal seams (Height) |
to 12 m | full resistance of facade |
| 6-8 m | full resistance of facade |
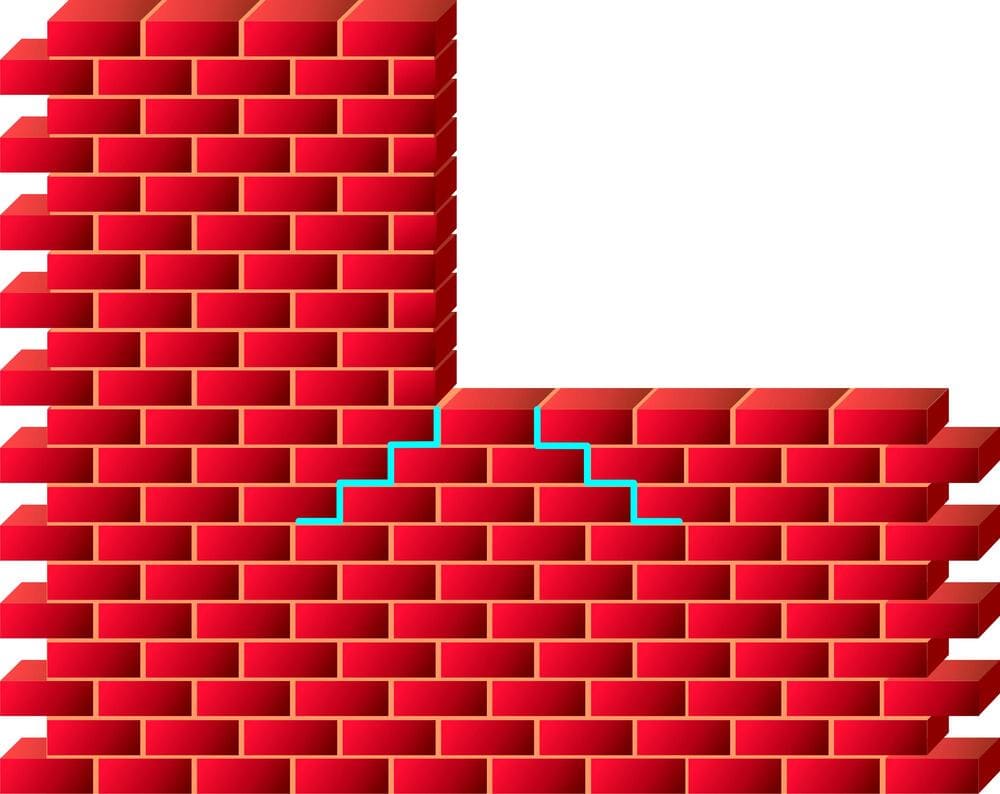
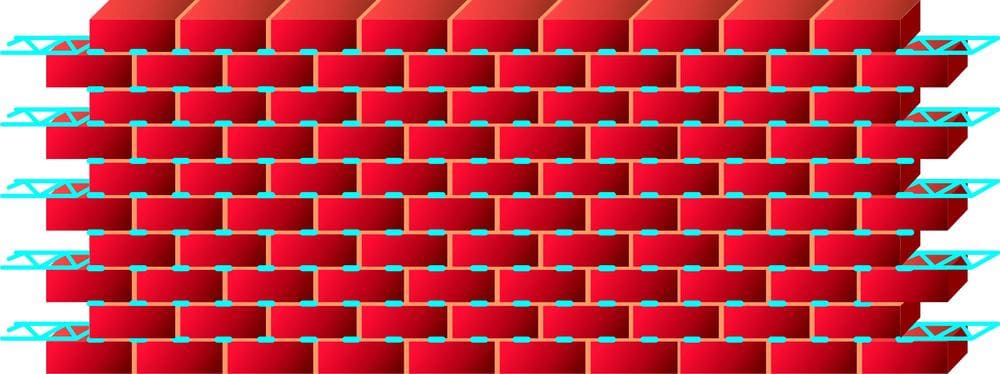
Implementation of horizontal and vertical deformation seams looks like this:

| Horizontal seam | Vertical notched seam | Vertical straight seam |
After the equipment, deformation seams has to be sealed with a special elastic polymer material – deformation band.
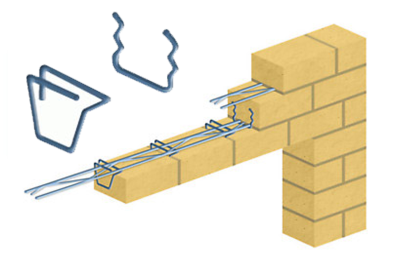
Amplification facades
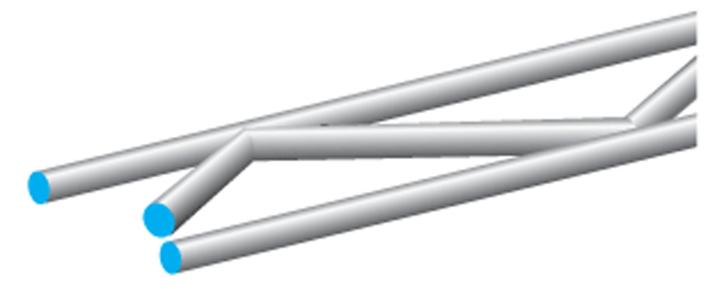
Usage of enhanced MURFOR facade will prevent from cracking due to uneven load in different parts of the wall. MURFOR armature is a welded structure with two parallel rods connected by a sinusoidally curved third rod.
Pledged into solution it relieves tension in problem areas of masonry, distributing it evenly. Usually the areas where there is tension, are located in windows and doorways, places where elevation changes masonry.
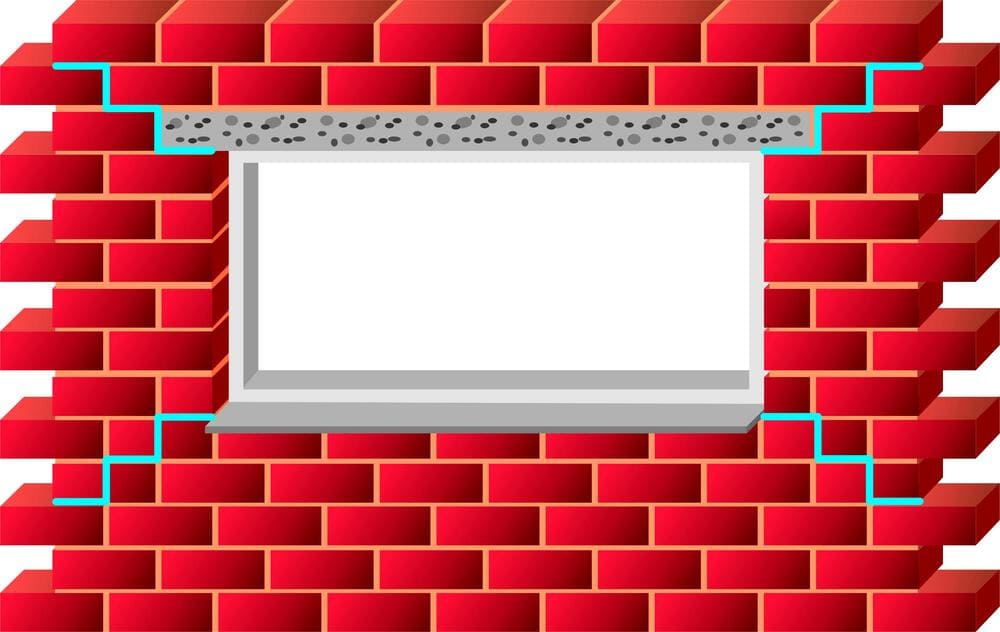
Window aperture
 |
 |
Doorway
 |
 |
Changing of the wall`s height
 |
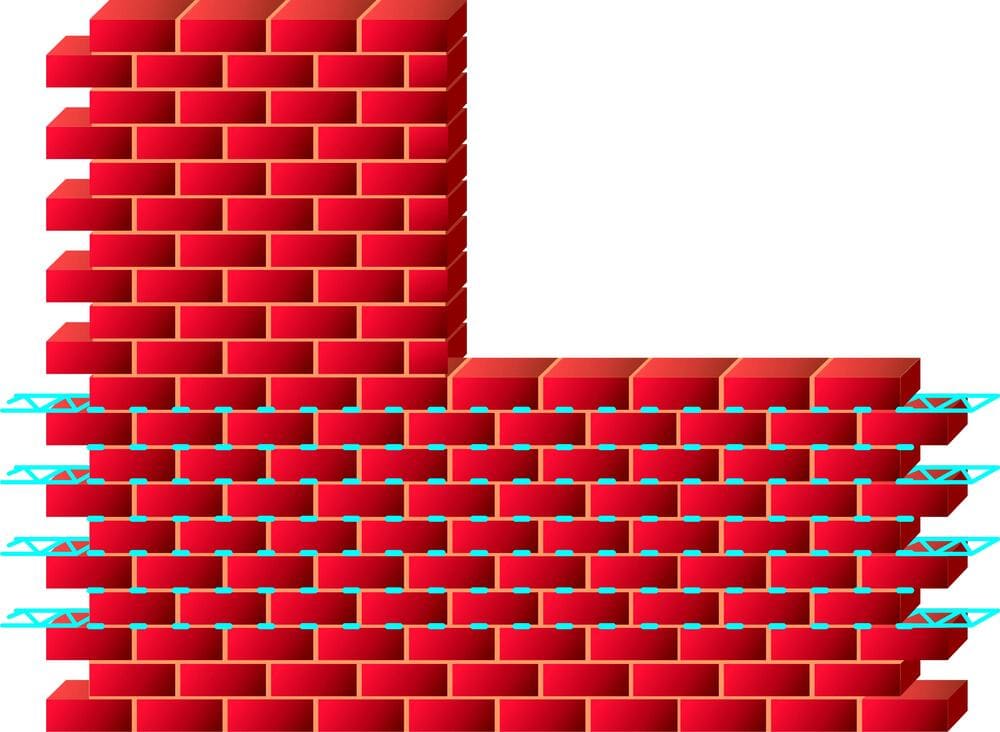 |
To prevent walls from destruction due of the possible subsidence of soil, five bottom rows of masonry and each additional 5-6 series are reinforced
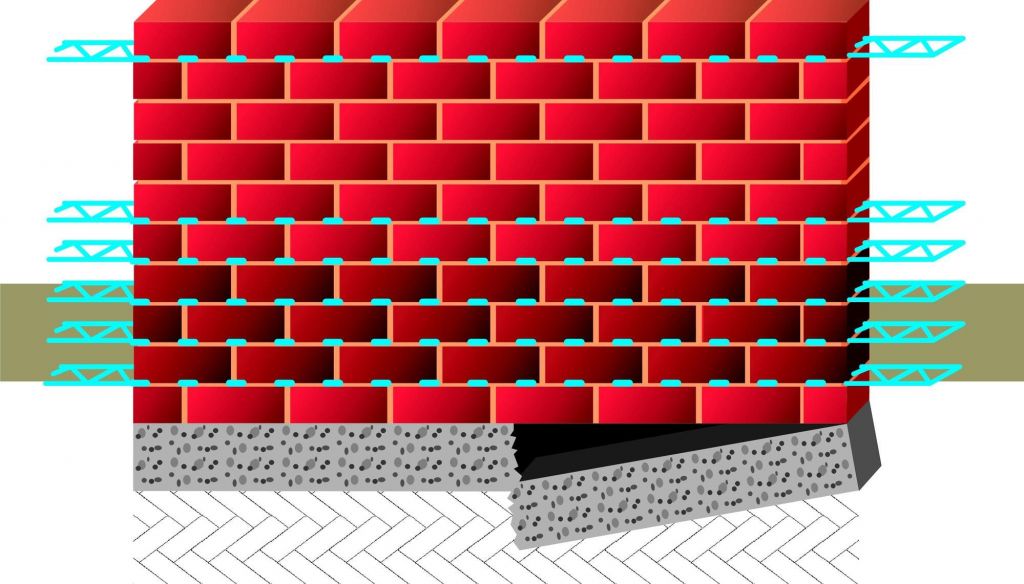
In some cases, the use of MURFOR armature can significantly extend the distance between the deformation seams or absolutely avoid them.
In some cases, the use of MURFOR armature can significantly extend the distance between the deformation seams or absolutely avoid them.
 |
 |
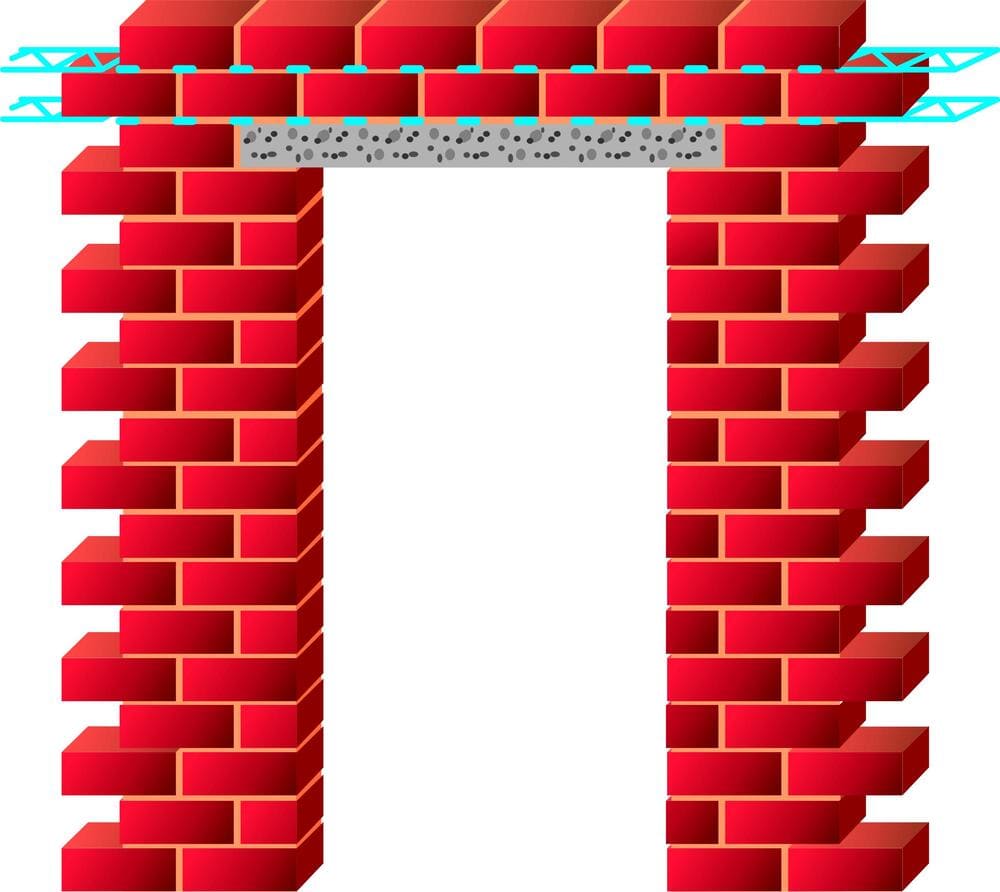
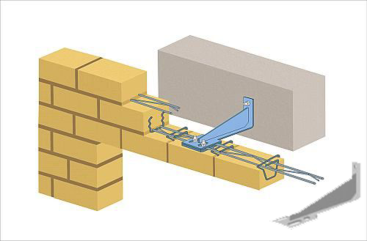
Using special clamps with MURFOR armature, allows to perform jumpers over windows and doors
Horizontal masonry
Vertical masonry
Nets mounted on consoles
Clamps are placed in the front row along the edges of the hole and in every second vertical jumper`s seam for vertical batches and each vertical seam for horizontal masonry. MURFOR armature laid between the first and second, and between second and third rows on the entire length of the bridge and its edges.
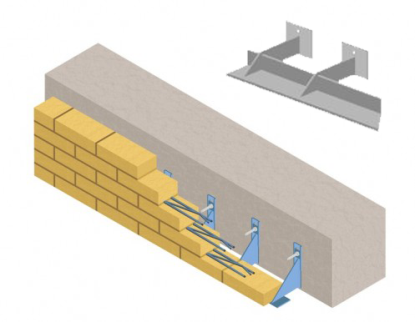
Using special hinged Baut consoles with MURFOR armature allows you to create a system of hinged fronts, which is particularly important for building construction.
For this purpose a number of consoles, which fits the first row of masonry facade attached to the bearing wall around the building. Then in the first rows laid MURFOR armature, creating nets, which serves as a support for the following
Series of masonry.
Performing of hinged facades uses in such cases:
- High-rise building, at the height of the facade over 12m;
- When the exterior masonry starts with, for example, the second floor;
- The equipping of horizontal seams;
- The equipping of bridges longer than 2 meters
.